Have you ever gone to Costco and seen those giant bags of peeled garlic? And you think to yourself how can I justify getting that? The possibilities seem endless, but then you think practically about it: I don’t eat that much garlic. An Italian family of 10 probably doesn’t eat that much garlic. I tried freezing it once, and I think that technically “works,” but the garlic didn’t look nearly as appetizing after spending Q1 through Q3 in the freezer.
But also, have you ever roasted garlic the way you’re “supposed” to? With the peels? (AKA garlic “in a wrapper”). And it’s always a pain in the ass to peel the flakes off after the garlic is roasted, and squeezing a boiling hot head of garlic has gotten me more than once.
Well then this is the place for you! I LOVE roasted garlic. I bought a roasted garlic terracotta kit, I will eat anything with roasted garlic, or make anything that calls for roasted garlic (braised roasted white beans in the winter…) But I hate roasting garlic. So here’s how I do it, and it’s the perfect project for a Sunday afternoon when you’re making a big meal in the kitchen. It’s perfect to make and give as hostess gifts to friends (I actually haven’t followed up with any recipient of my roasted garlic gifts to see if they actually use it or like it or were just like “WTF Eleanor just bring a bottle of wine like a normal person next time”). But you asked for it! Just kidding, no one asked for this. Because no one reads this, because I haven’t given the link to a soul.
ROASTED GARLIC (aka roasted garlic confit, creamy roasted garlic, canned roasted garlic, easy roasted garlic, mass produced roasted garlic, roasted garlic for the masses, I don’t know)
Ingredients:
- A big ass bag of peeled garlic, or some tubs of peeled roasted garlic, or if you’re a show off, peel your own garlic—dweeb!)
- A cup and a half of olive oil (or whatever feels right to you, but have the bottle out just in case)
- 2 tablespoons of big flakey salt (or again, whatever feels right to you. *salt to taste)
- 6-8 sprigs of rosemary (optional)
- 10 sprigs of thyme (optional)
- 10 sprigs of oregano (optional)
- 1 tablespoon red pepper flakes (optional)
Directions:
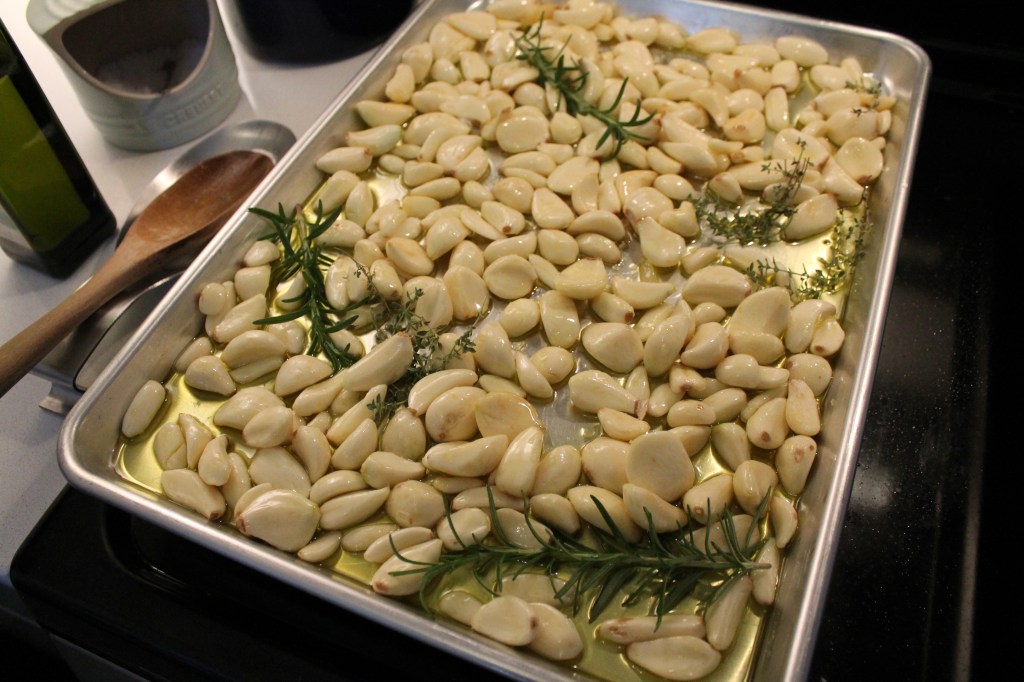
- Preheat oven to 200F
- Get out two medium roasting pans
- Dump garlic cloves in a big bowl and toss with 1/2 cup olive oil. Once garlic is sufficiently covered, spread out on roasting pans evenly. Nestle herb sprigs throughout the garlic cloves.
- Drizzle pan with additional olive oil (until the cloves are fully covered, but there’s not an even layer of oil around the pan). Sprinkle the pans with salt and red pepper flakes, if using.
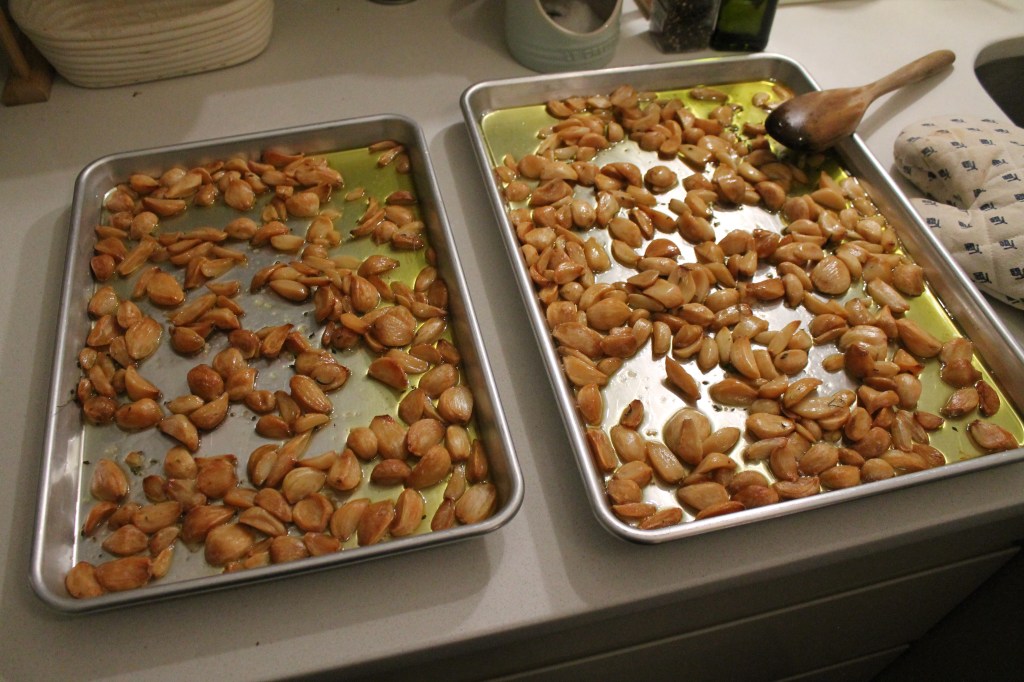
- Put those guys in the oven, and stir every 15 minutes or so.
- Keep an eye on it though because it’s a pain in the ass when you burn it. It takes about 2 hours to fully cook, but you’ll want to check them for a lighter bronze color (an early season, spring break spray tan) and slightly soft.
- When cooled slightly, remove stems from herbs.
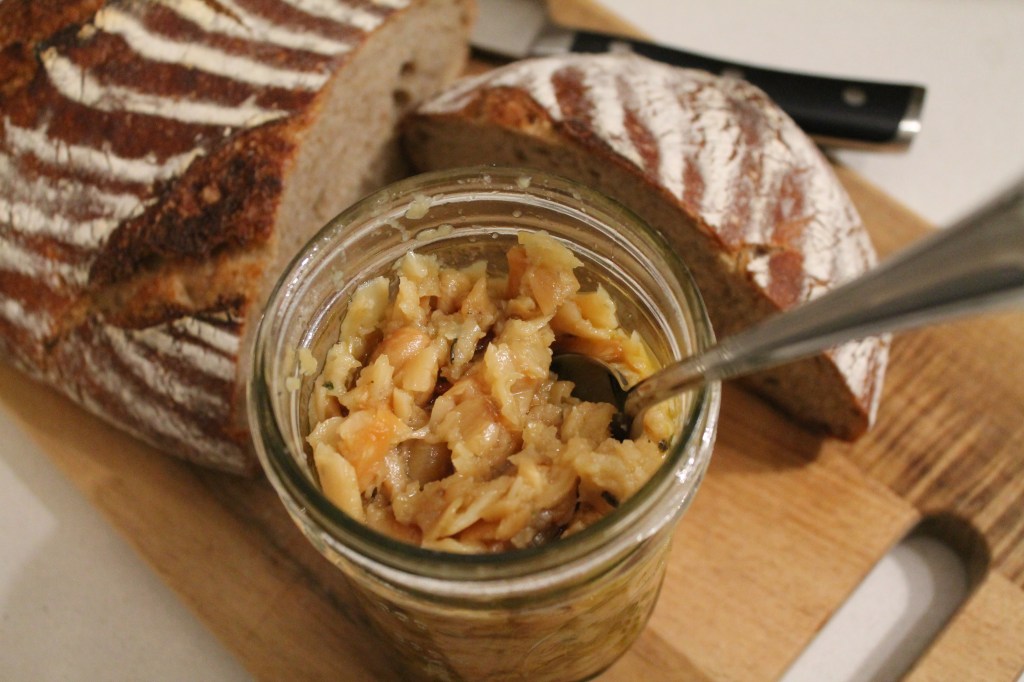
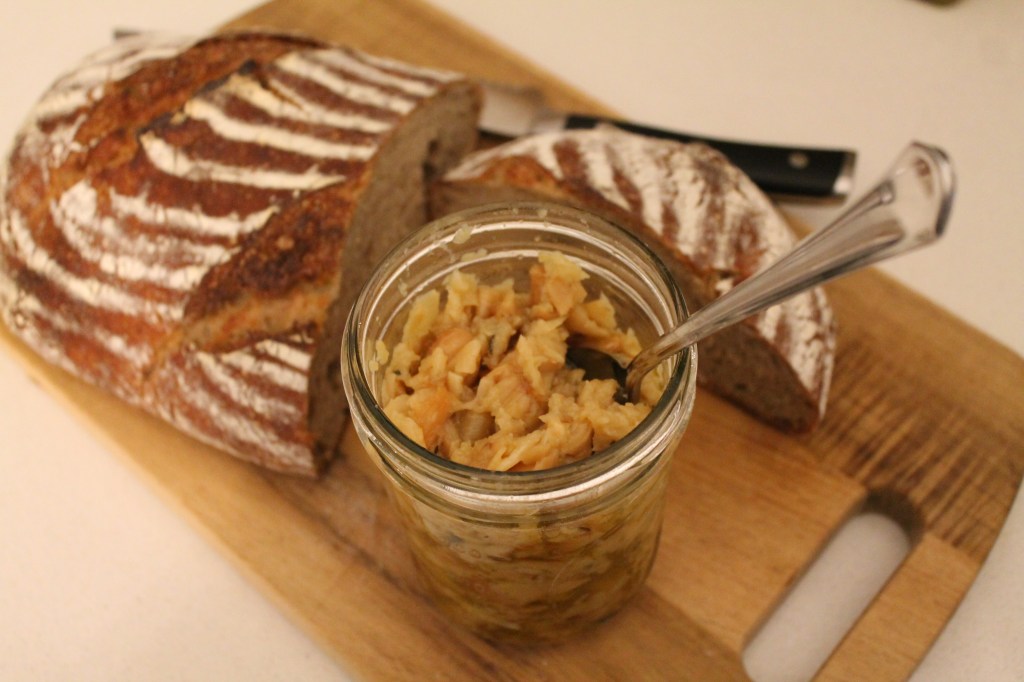
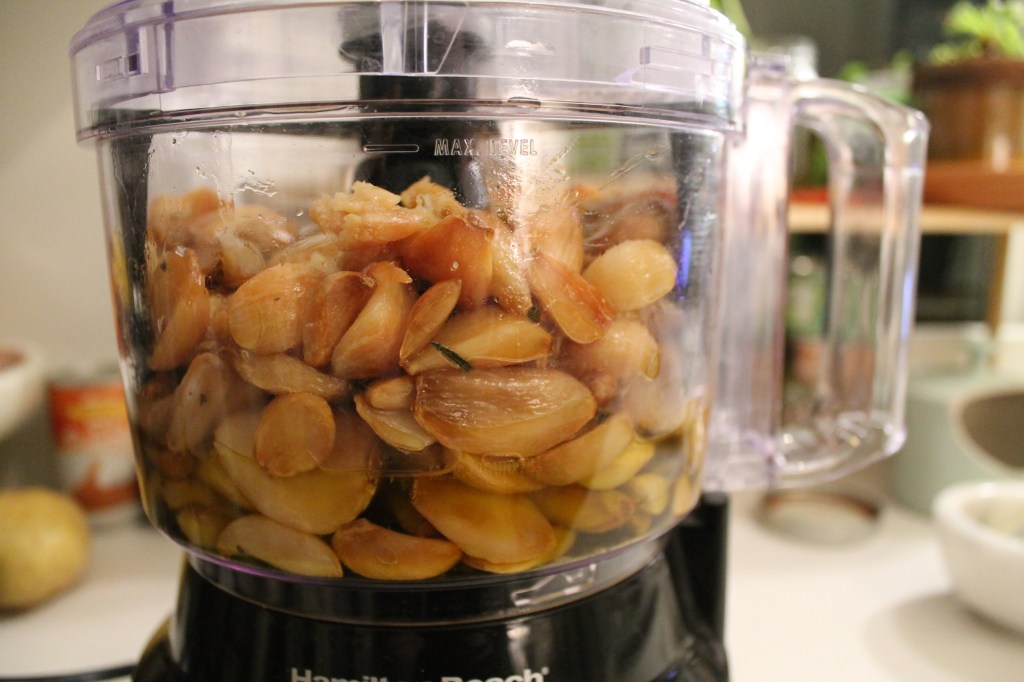
- OPTIONAL, for a more-confit like texture: Transfer roasted garlic and herb leaves to a food processor (or a mortar and pestle if you’re fancy). Pour a touch more olive oil over, until it feels right and blend-able to get the texture that you want. I poured with my heart, but made sure it was at least able to be properly chopped up in the food processor. Pulse a few times until you achieve the desired consistency.
Transfer to glass jars, cleaning off the top of the lids.
These jars will last in the fridge for a couple of weeks. Note: depending on the kind of olive oil you use, the oil might congeal a bit in the fridge. That’s okay. When it’s warmed up, it will be no different.
Tie a cute little ribbon around the top and take it to your friends!
I like to spread mine on top of fresh bread and toast in the toaster oven, or add to any sort of pasta sauce or risotto, add to braised white beans… the opportunities are endless, and I would love to hear anything else you find to put it on.

Leave a comment